
If you’ve ever felt like small-group phonics is a little bit… chaotic, you’re not alone. Between rotating groups, pulling materials, remembering which skills you covered, and helping five kids at different levels all at once, it can feel like you’re juggling literacy, logistics, and sheer luck.
For years, I felt like I was reinventing the wheel every time I taught a new skill. One day I’d make a quick digraph chart. The next day I’d pull an old “Magic E” poster from a random folder. By the end of the week, I’d have a pile of loose papers and no idea which group had what.
You need something simple. Predictable. And actually easy for kids to use.
Student phonics notebooks are one of my favorite small-group tools. Nothing fancy. Just a notebook, a routine, and mini phonics anchor charts that kids can flip to for review or spelling reference.
Today I want to show you why building these notebooks works so well and how my Phonics Anchor Charts for Student Notebooks take all the planning and guesswork off your plate.

Why Phonics Notebooks Work So Well
There is something magical about giving students their own phonics reference book. The notebook becomes a personal toolkit that grows with them through the year. It supports reading, writing, small groups, centers, and even independence.
Here are the reasons I love building a phonics notebook with my students:
1. It keeps small groups structured and consistent
Small groups are already fast-paced. When you have a predictable notebook routine, you always know what comes next and students do too. It removes that “Wait, how should I teach this again?” moment.
2. No more wasting time looking for charts or examples
When the chart is glued into the notebook, it’s always there. You never have to stop a lesson to hunt for a reference. These have the rule or generalization to help you teach the skill using kid-friendly language. Revisit them as needed simply by flipping back to the page.
3. Kids actually remember skills
Instead of teaching Silent e in October and looking for more materials to reteach it again in December, you can flip right back to their chart to review. The built-in spiral review is such a timesaver.
4. You stay organized without extra effort
Instead of posters all over the room or random handouts, every skill lives in one place. You flip through the notebook and instantly know what the child has learned.
5. Students stop asking the same spelling questions
We love them, but if I had a dollar for every “How do I spell…?” I’d be retiring in a villa somewhere. You know what I’m talking about! But when the chart is right in their notebook, they become more independent and confident during writing.
6. Students apply phonics skills with an “I do, We do, You do” model
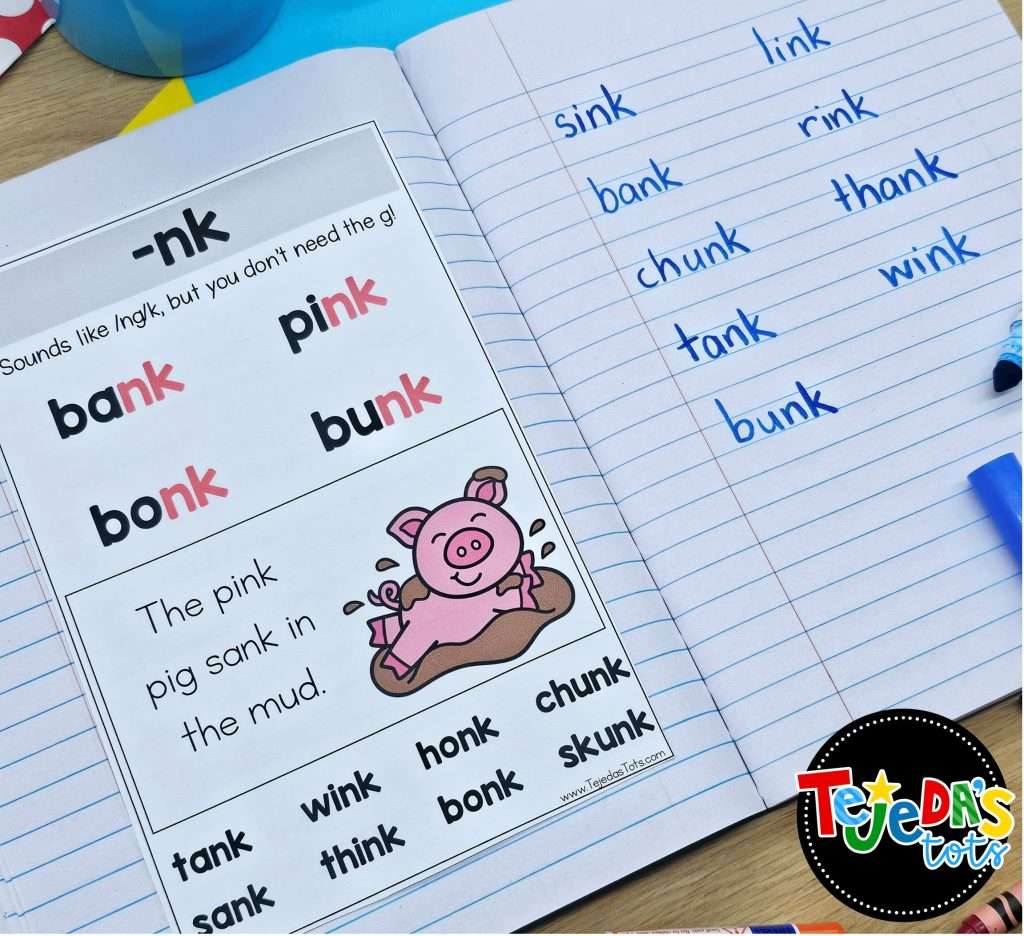
The chart is on the left page, you teach the rule, go through the examples together, then students apply the skill by writing on the opposite page.
I included the suggested dictation or extension activity, so you don’t even have to come up with them yourself! Just dictate the words and sentence for them to write on the opposite page. Below is an example of the “Skills & Tips” page that lists the dictation or extension activity.

7. It helps families see what you’ve taught
If a notebook goes home, the communication is so clear.
This little system quietly keeps families in the know without adding more to your plate.
How to Use Phonics Anchor Charts
You can use the slides whole-group to introduce or review the skill, or as a reading warm-up.
In small groups or intervention sessions, this is the simple routine we follow:
1. Use the anchor chart to teach the skill.
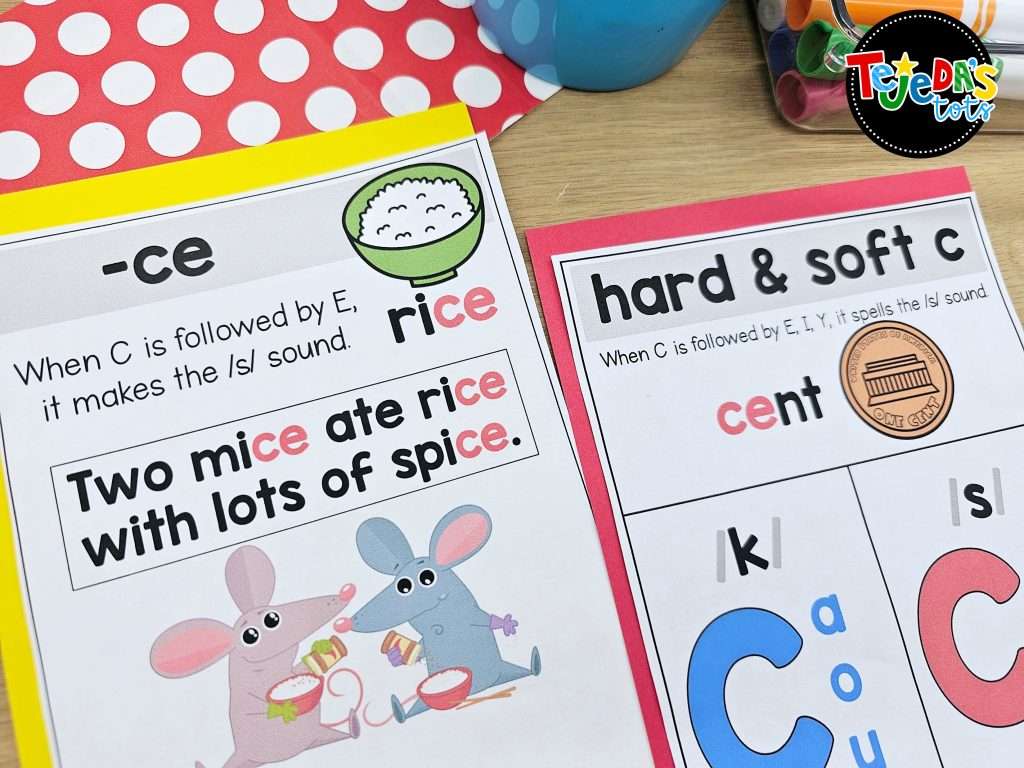
I read the definition or tip and show the main example. Then, we read the practice words together. Many posters also have a sentence to practice reading in context. Everything they need for that skill lives on this page.
2. Glue the mini phonics anchor chart into student notebooks.
We glue them to the left side and leave the right side blank for step 3.
3. Write words or a sentence on the opposite page.
Students apply the skill right away. A few words and/ or a sentence makes a big difference.
4. Flip back to review.
This is where the notebook truly shines! Kids can revisit older pages during reading, writing, or partner work without you prepping anything extra. Need to review a skill? Just flip back for a fresh reminder and concrete examples.
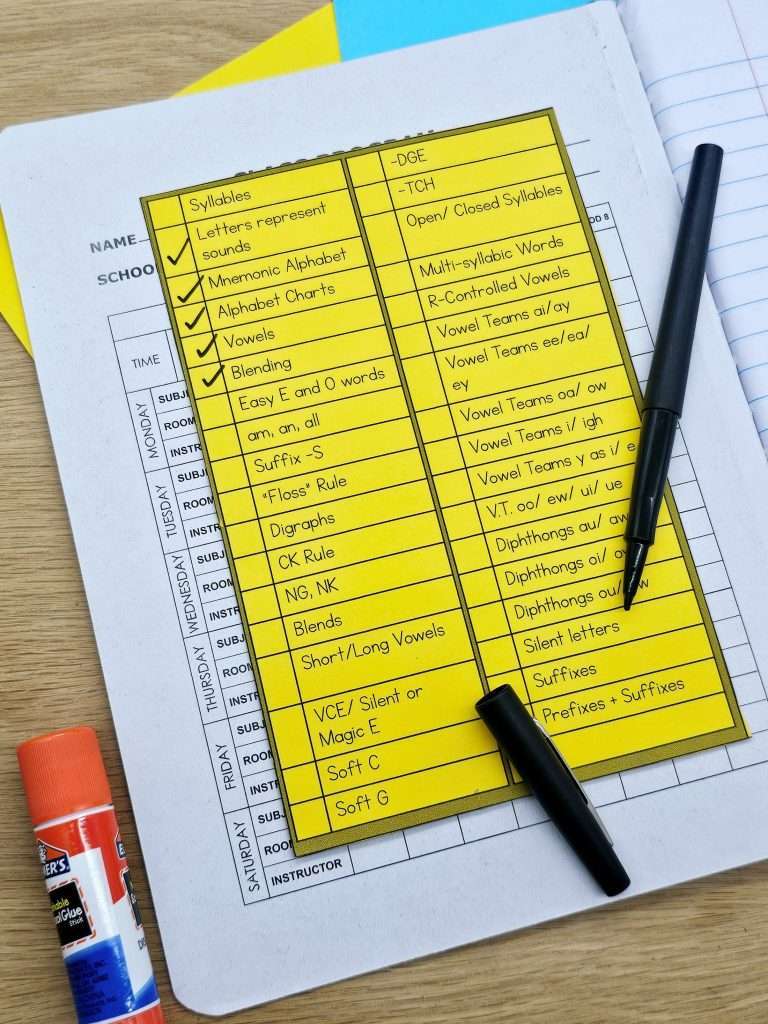
TIP: Glue the skills checklist to the inside cover to keep track of skills covered with each student.
The Done For You Phonics Notebook System
From letter sounds to vowel teams and diphthongs, this set is designed for K-2 skills, using:
Kid-friendly definitions
Short, simple wording that even your beginning readers can understand.
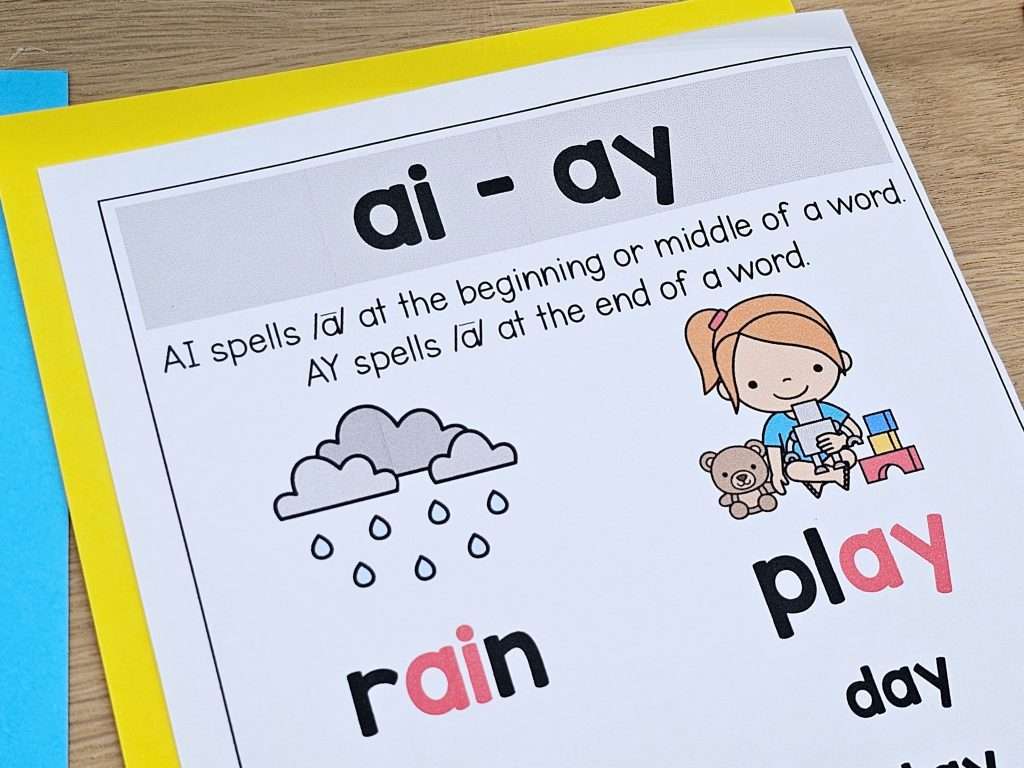
Clear picture examples
Students anchor the skill to a visual immediately. I even added mnemonic alphabet pages for the most beginning learners.

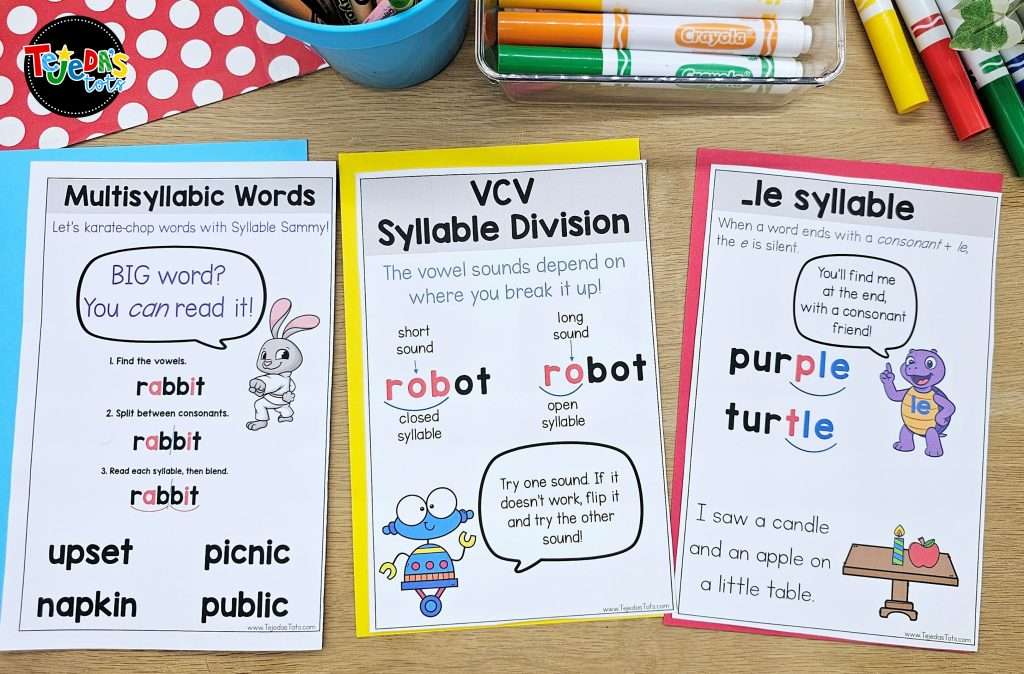
From alphabet charts to multisyllabic words and vowel teams, you’ll find a chart for every K-2 phonics skill!
Concept & Skills for K-2:
- Counting syllables
- Letters represent sounds
- Mnemonic Alphabet (regular alphabet as well)
- Alphabet charts
- Vowel extension
- Vowel characters
- Blending
- Easy E and O words
- Glued Sounds
- Suffix -s
- FLOSS rule
- Digraphs
- C or K?
- -NG, -NK
- Blends
- CVCe
- Hard and Soft C and G
- Open/ Closed syllable
- Multisyllabic words
- Syllable division
- R-controlled vowels
- Vowel teams
- Diphthongs
- Silent letters
- Suffixes s, es, ed, ing
- Advanced suffix rules
- Tricky concepts: b/d and p/q reversals, TR and Dr
If it’s in your phonics scope and sequence, it’s in the set.
Ready to Build Phonics Notebooks With Your Students?
This is one of the simplest routines you can add to your literacy block and one of the most powerful. Students build ownership, independence, confidence, and incredible phonics knowledge.
If you want the done for you version that saves you all the design, formatting, and prep time, you can grab mine right here: Phonics Anchor Charts for Student Notebooks
Whether you use mine or make your own, I hope this notebook system brings you the same calm, clarity, and student growth it brought to my small groups.
If you try it, I would love to hear how it works for your class. Leave a comment below!
Looking for more tools and tips for small group instruction? Read these posts:
- Small-Group Reading, part 1: How to set up your reading area
- Small-Group Reading, part 2: What to teach your first lesson
- Small-Group Reading, part 3: 7 Key components for an effective lesson
Pair these anchor charts with no-prep 2-page lessons that incorporate phonics, comprehension, fluency, and writing!
Phonics Small-Group Lesson Pages

Leave a Reply